Day 46 Set up CloudWatch alarms and SNS topic in AWS

🛠️ Exploring DevOps tools: Docker, Kubernetes, Jenkins, Terraform, and more. 🌐Let's connect, learn, and grow together.
Day 46 of #90daysofdevops
Hey Techies! Welcome to this blog
In this blog, we are going to start with Set up CloudWatch alarms and SNS topic in AWS
Introduction
In the ever-evolving landscape of cloud computing, effective monitoring is crucial to ensuring the health, performance, and security of your applications and infrastructure. Amazon Web Services (AWS) provides a robust monitoring solution through CloudWatch Alarms and Simple Notification Service (SNS) Topics. In this blog post, we'll delve into the functionalities of CloudWatch Alarms and SNS Topics, exploring how they can be leveraged to create a proactive monitoring system for your AWS resources.
Understanding CloudWatch Alarms
1. What are CloudWatch Alarms?
CloudWatch Alarms are a pivotal component of AWS CloudWatch, a fully-managed monitoring and observability service. Alarms allow you to monitor your AWS resources and perform actions based on predefined thresholds. These resources could range from EC2 instances and RDS databases to custom metrics generated by your applications.
2. Creating CloudWatch Alarms
Creating a CloudWatch Alarm involves defining a metric, setting a threshold, and specifying actions to be taken when the threshold is breached. This could include sending notifications, stopping or terminating instances, or triggering Auto Scaling actions.
3. Metric-Based Alarms
CloudWatch Alarms are primarily metric-based, which means they rely on specific metrics to trigger actions. Understanding the metrics relevant to your applications is crucial for setting up effective alarms. Metrics can include CPU utilization, network throughput, and custom metrics generated by your application.
Amazon Simple Notification Service (Amazon SNS) is a web service that makes it easy to set up, operate, and send notifications from the cloud.
Feature of Amazon SNS
Automatic Scaling: It scales consequently if the number of messages increases.
Message Encryption: It provides encrypted topics to protect your messages from unapproved and unknown access. The message gets decrypted as they are delivered to subscribing endpoints.
Message Filtering: It enables the subscriber to modify a filter policy so that it only gets the notifications it is interested in.
Message Fanout: It takes place when a message is sent to a topic and then replicated and pushed to multiple endpoints. Fanout gives asynchronous event notifications, which in turn allows for parallel processing.
Mobile Notification: It can be activated by user-driven actions within an application or from business logic within the cloud. It is low-cost to fan out mobile push notifications for iOS, Android, Fire OS, Windows, and Baidu-based devices.
SNS & Email Messages: Amazon SNS provides the features to send text messages and email (SMTP).
Types of AWS SNS Topics
There are 2 types of AWS SNS Topics:
Standard Topic
FIFO Topic
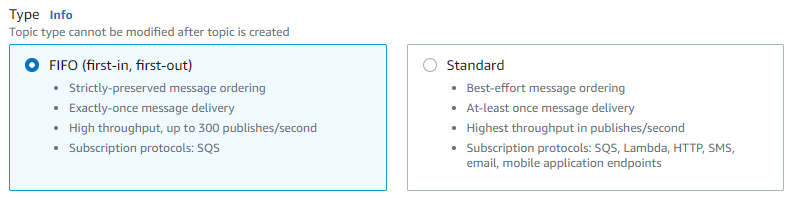
Difference between Standard and FIFO Topic
Standard Topic is used in many scenarios where the order of messages is not important while FIFO Topic is used in messaging between applications where the order of operations and events is critical.
Standard Topic supports a nearly unlimited number of messages per second whereas FIFO Topic supports up to 300 messages per second or 10 MB per second per FIFO topic.
In a standard topic, a message is delivered at least once, but there might be more than one copy of a message delivered but in a FIFO topic, duplicate messages are not delivered.
In standard topic, each account can support 100K standard topic and each topic support up to 12.5M Subscriptions whereas in FIFO topic, Each account can support 1000 FIFO topics and each topic supports up to 100 Subscriptions.
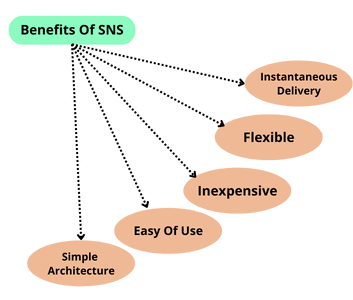
Benefits of AWS SNS
Instantaneous Delivery: It is based on push-based delivery. It is pushed once we publish the message on a topic and the message is delivered to multiple subscribers.
Inexpensive: It is based on pay as you use the model, i.e. we need to pay only when we are using the resources with no up-front costs.
Flexible: It supports multiple endpoints. Various endpoint types can receive the message over multiple transport protocols such as email, SMS, Lambda, Amazon SQS, HTTP, etc.
Ease of use: It is a very simple service to use as the Web-based AWS Management Console offers the effortlessness of the point-and-click interface.
Simple Architecture: SNS is utilized to simplify the messaging architecture by offloading the message filtering logic from the subscribers and message routing logic from the publishers. Rather than receiving all the messages from the topic, SNS sends the message to subscriber-only of their interest.
Steps to Configure Amazon SNS
In these steps, we are going to configure Amazon SNS. For creating AWS Free Tier Account click here: AWS Free Tier Account
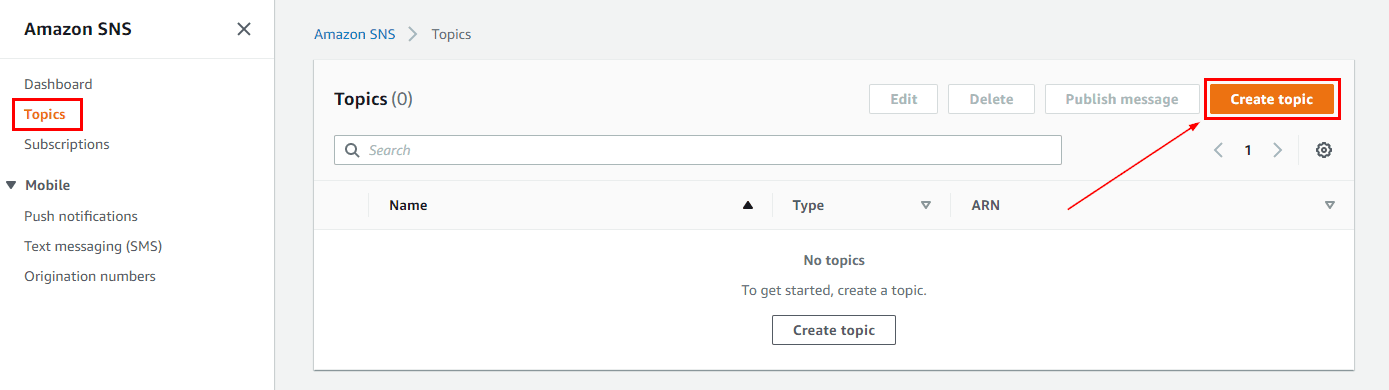
1) Search SNS in the search bar and click on it. Afterwards, click on the Topics on the top left side of the Console and then Click on Create Topic to create a new topic
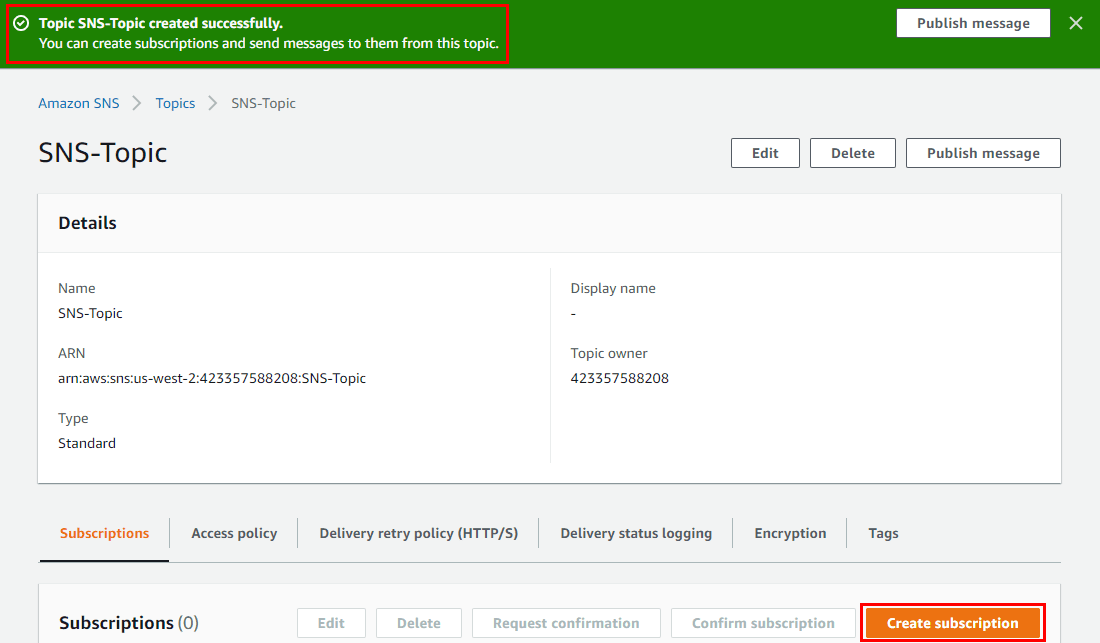
2) Select Standard type and Enter the Topic name. Scroll down and click on Create Topic.

3) Now, the Topic has been created successfully. Scroll down and click on Create Subscription.
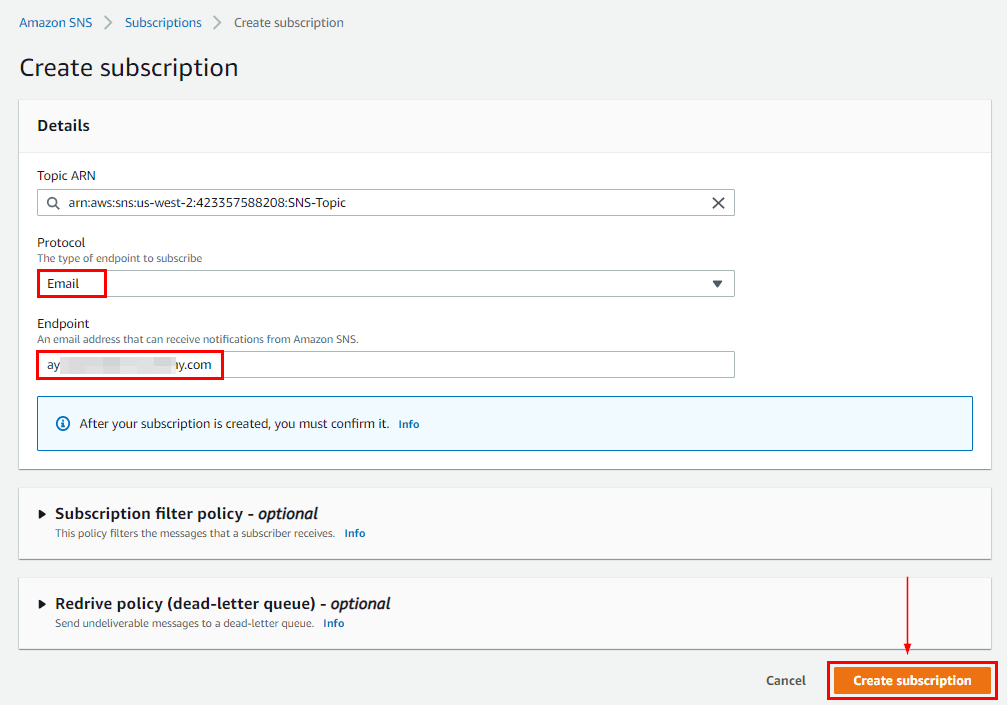
4) Under Protocol choose the endpoint as Email and enter the Endpoint address, click on Create Subscription. Now, the subscription will be created and the status of the subscription is pending.
5) The email will be sent to the subscriber for confirmation of the subscription. The subscriber has to open the email and click on Confirm Subscription. After this subscription will be confirmed.


6) Now, the status of the subscription will be confirmed, and then click on the Topic name. After that click on Publish Message.
7) Enter the subject name and message body. Scroll down and click on Publish Message.

8) Now, the subscriber will receive the message on the mentioned email address.

Task :
- Create a CloudWatch alarm that monitors your billing and send an email to you when a it reaches $2.
(You can keep it for your future use)
To enable the monitoring of estimated charges
- Open the AWS Billing console at https://console.aws.amazon.com/billing/.

- In the navigation pane, choose Billing Preferences.
- By Alert preferences choose Edit, Choose Receive CloudWatch Billing Alerts, and Choose Save preferences.

Creating a billing alarm
- Open the CloudWatch console at https://console.aws.amazon.com/cloudwatch/.

- In the navigation pane, choose Alarms, and then choose All alarms.

- Choose to Create Alarm select metric

- In Browse, choose Billing, and then choose Total Estimated Charge

For Statistic, choose Maximum For Period, choose 6 hours
For the Threshold type, choose Static.
For Whenever EstimatedCharges is choose Greater
For then define the value that you want to cause your alarm to trigger
Under Notification, ensure that In alarm is selected. Then specify an Amazon SNS topic to be notified when your alarm is in the ALARM state. The Amazon SNS topic can include your email address so that you receive an email when the billing amount crosses the threshold that you specified.
You can select an existing Amazon SNS topic, create a new Amazon SNS topic, or use a topic ARN to notify another account. If you want your alarm to send multiple notifications for the same alarm state or for different alarm states, choose Add Notification.
Under Name and Description, enter a name for your alarm

Under Preview and create, make sure that your configuration is correct, and then choose Create alarm.


Delete your billing Alarm that you created now.

Select the checkbox of the alarm you want to delete. Navigate and click on Actions, Under it, click on Delete.

That's it! You've just completed the task. 🎉
Thank you so much for taking the time to read till the end! Hope you found this blog informative and helpful.
Feel free to explore more of my content, and don't hesitate to reach out if need any assistance from me or in case of you have any questions.
Happy Learning!
~kritika :)
Connect with me: LinkedIn


