Today's topic is on the core ECS, ECR, Route53 & CloudFront.
What is Elastic Container Service?
- Amazon Elastic Container Services (Amazon ECS) is a fully managed container orchestration service that helps organizations easily deploy, manage, and scale containerized applications.
What is Elastic Container Registry?
- Amazon Elastic Container Registry (ECR) is a fully managed Docker container registry service provided by Amazon Web Services (AWS). In simple terms, it's a place where you can store, manage, and deploy Docker container images, making it easier for you to run applications in the cloud using containers.
What is Route 53?
- Amazon Route 53 is a scalable and highly available Domain Name System (DNS) web service provided by Amazon Web Services (AWS). It is named after the TCP/IP port 53, which is used for DNS services. Route 53 is designed to provide reliable and cost-effective domain registration, DNS routing, and health checking of resources within your AWS infrastructure.
Tasks:
1) Deploy an application on Elastic Container Service (ECS) and configure Elastic Container Registry (ECR) to push docker images.
Note:The Docker image must be fetched from ECR.First Clone the Code on an EC2 server
Code Url: GitHub Repo
Then go to ECR
And create a repository
To push the image we have to follow this step
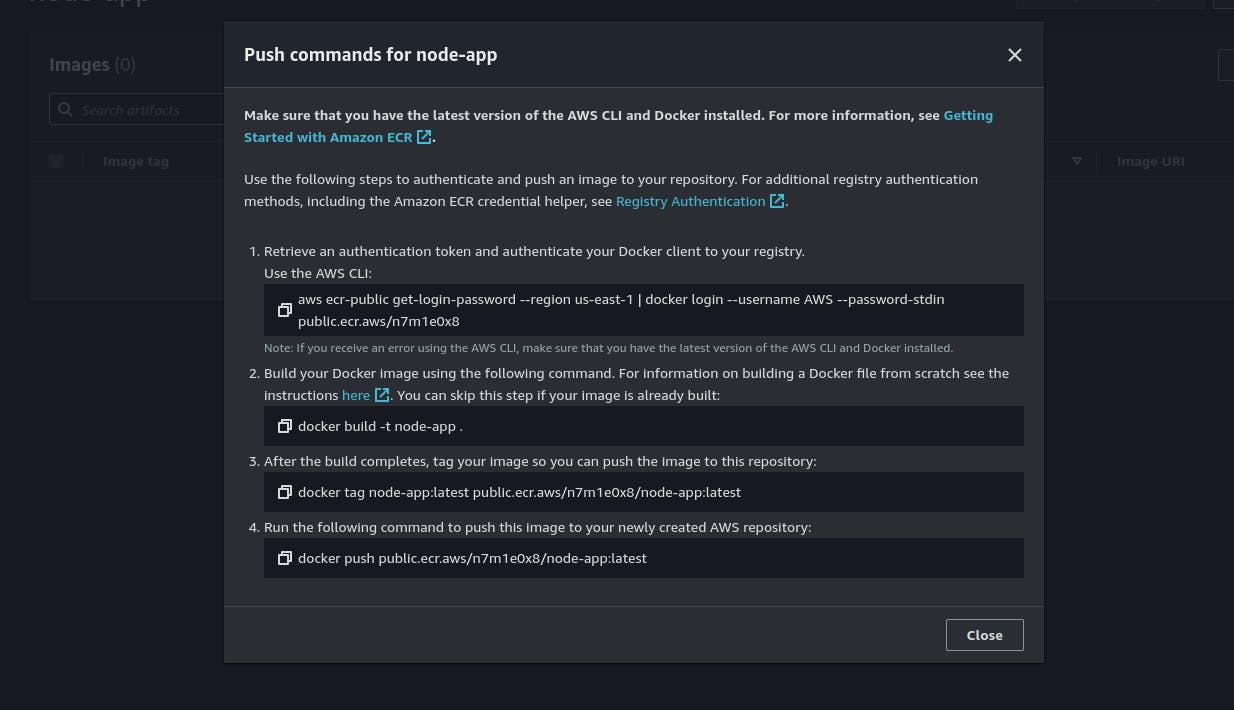
Finally image was pushed

Next we are going to setup ECR
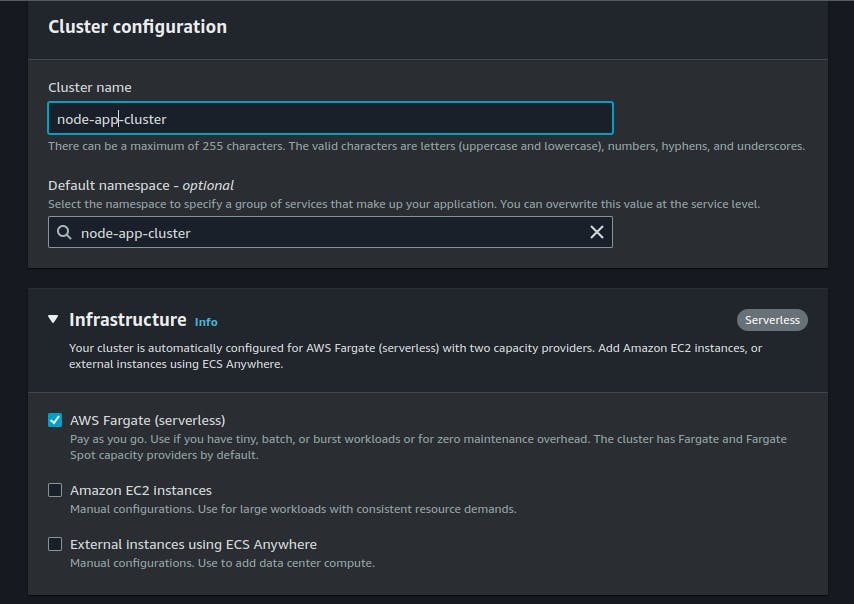

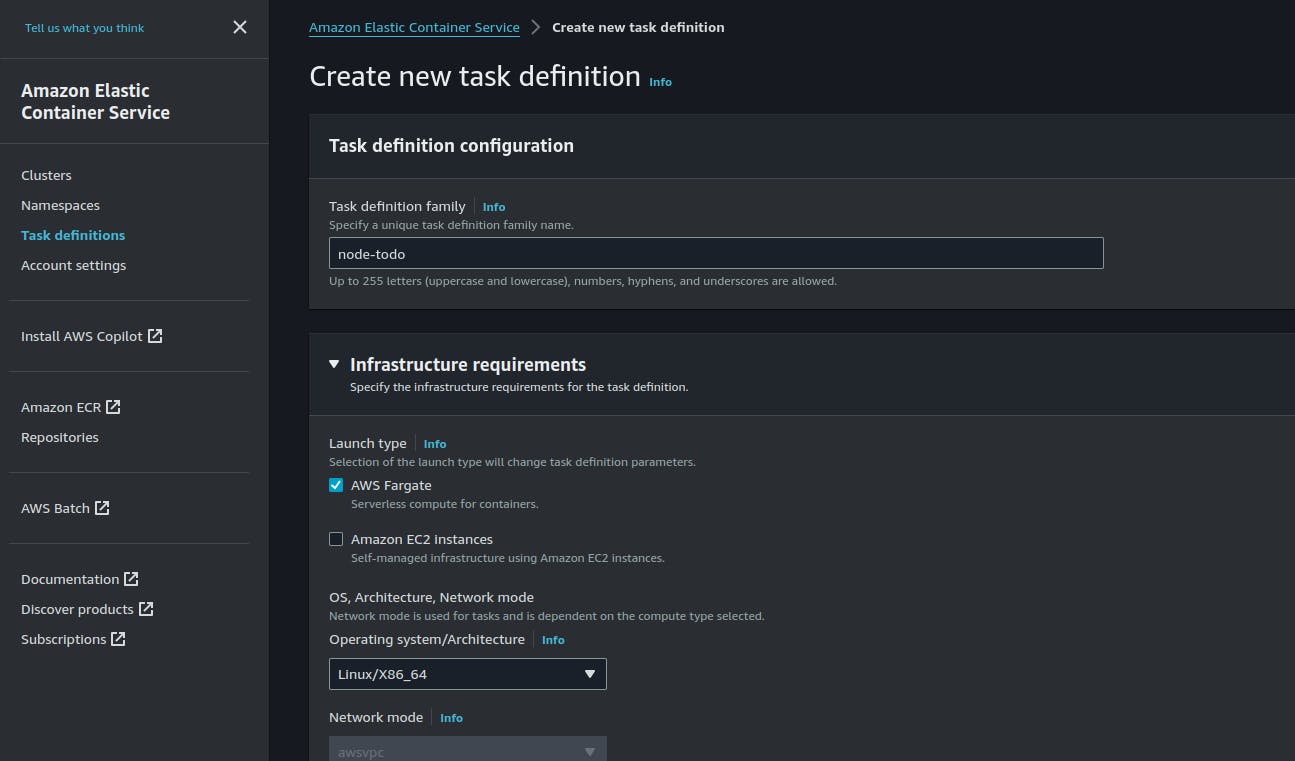
Then ECS

Run Task
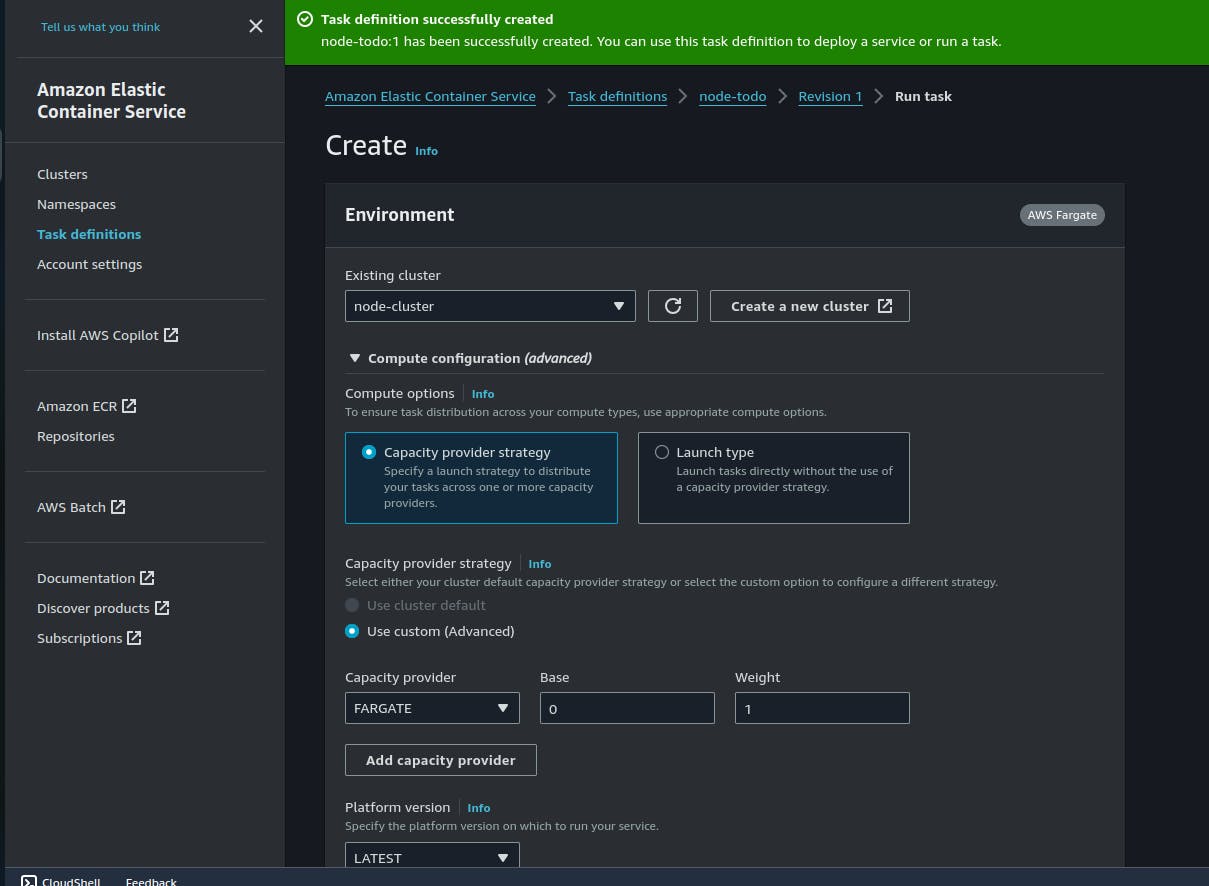
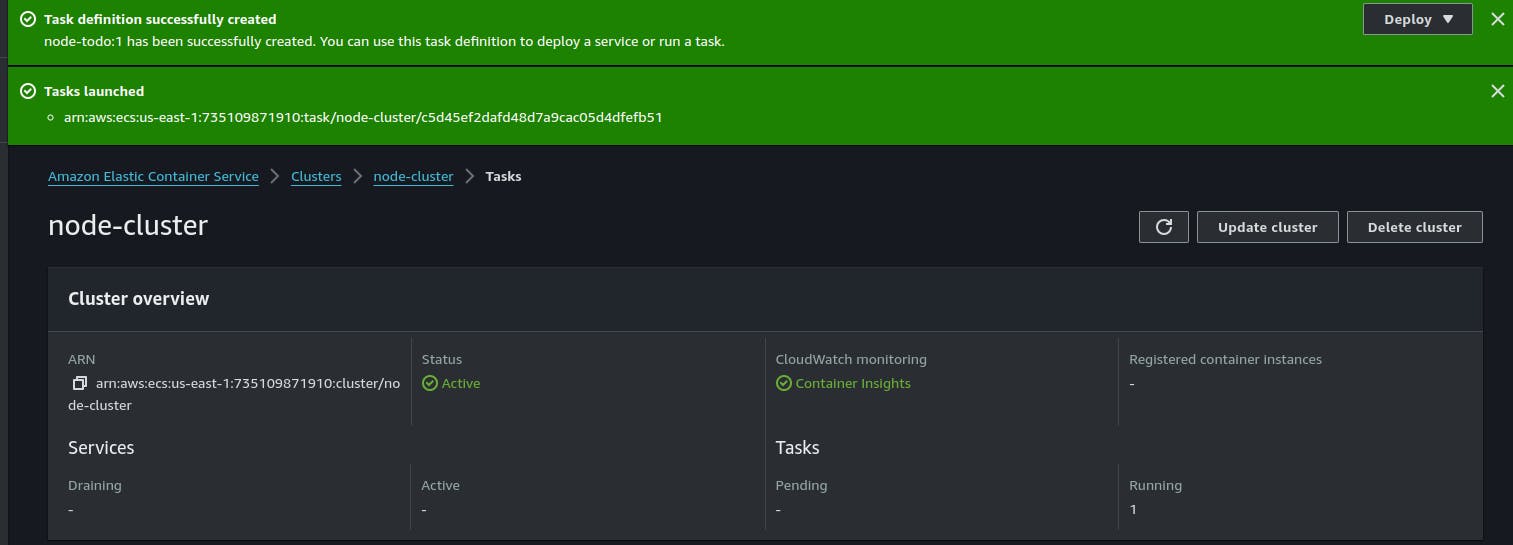

Now check the port <ipaddress>:8000

2) Understand the concept of CloudFront and try to perform below sub-tasks:
- What is caching in cloudfront?
- Create an EC2 instance with apache webserver
- Create a CloudFront distribution and attach to EC2 instance to access the apache webpage.
Amazon CloudFront is a content delivery network (CDN) service that accelerates the delivery of your websites, APIs, and other web assets. Caching in CloudFront involves storing copies of your content (e.g., images, videos, web pages) in multiple locations around the world, known as edge locations. When a user requests content, CloudFront delivers it from the nearest edge location instead of going all the way to the origin server (e.g., your EC2 instance). This reduces latency and improves the overall performance of your application.
CloudFront supports various caching configurations, including:
Object Caching: Caching of individual files (e.g., images, CSS, JavaScript).
Default TTL (Time-to-Live): Specifies how long CloudFront caches an object before fetching a fresh copy from the origin server.
Minimum TTL: Specifies the minimum amount of time an object is considered fresh in the cache.
Maximum TTL: Specifies the maximum amount of time an object can remain in the cache.
Create an EC2 instance with an Apache web server:
Login to your AWS account. Go to the Ec2 service in the AWS Management Console.
Launch an EC2 Instance:
Go to the EC2 Dashboard.
Click on "Launch Instance" and select an Amazon Machine Image (AMI) (e.g.Ubuntu server 22.04 LTS).
Choose an instance type, configure instance details, add storage, add tags, configure security group settings (allow HTTP traffic on port 80), and review.
Launch the instance, selecting or creating a key pair.
Connect to the EC2 Instance:
Use SSH to connect to your instance.
Install Apache on the instance:
sudo apt install httpd.Start the Apache service:
sudo systemctl start httpd.Create a simple HTML file in the web root, e.g.,
/var/www/html/index.html, with some content.
Create a CloudFront distribution and attach it to the EC2 instance:
Create a CloudFront Distribution:
Go to the CloudFront service in the AWS Management Console.
Click on "Create Distribution."
Choose the delivery method (web or RTMP).
Configure the distribution settings, specifying the origin as your previously created EC2 instance's public DNS or IP address.
Configure additional settings like caching behavior, origin settings, and distribution settings.
Review and create the distribution.
Update DNS and Test:
Once the distribution is created, you'll get a CloudFront domain name (e.g., d12345abcdef.cloudfront.net).
Update your DNS records to point to this CloudFront domain.
Access your Apache web page through the CloudFront domain, and you should see the content served through CloudFront.
3) Learn about AWS fully managed DNS Service (Route53) and write a detailed blog and post it on linkedin.
Finding it difficult?
Amazon Route 53 is a fully managed Domain Name System (DNS) web service provided by Amazon Web Services (AWS). It is designed to provide highly reliable and cost-effective domain registration, DNS routing, and health checking of resources within your AWS infrastructure or on-premises.
Here are some key features and concepts related to Amazon Route 53:
1. Domain Registration:
You can register new domain names directly through Route 53. It supports various top-level domains (TLDs).
Domain registration includes features like domain auto-renewal and domain privacy protection.
2. DNS Routing:
Route 53 serves as a highly scalable and reliable DNS service to route end-user requests to globally distributed endpoints.
It supports various DNS record types, including A (IPv4 addresses), AAAA (IPv6 addresses), CNAME, MX (mail exchange), TXT (text records), and more.
3. Health Checking and Failover:
Route 53 allows you to set up health checks for your resources (such as EC2 instances or S3 buckets) to monitor their availability.
It can automatically route traffic away from unhealthy resources to healthy ones, providing a level of fault tolerance.
4. Traffic Flow:
Traffic Flow is a visual policy editor in Route 53 that enables you to define how traffic should be routed based on a variety of factors.
It allows you to create sophisticated routing policies for different use cases, such as weighted routing, latency-based routing, and geolocation-based routing.
5. Alias Records:
Route 53 supports alias records, allowing you to map your domain to AWS resources like CloudFront distributions, S3 buckets configured as websites, Elastic Load Balancers, and more.
Alias records are essentially pointers to AWS resources and are treated as A or AAAA records.
6. DNSSEC (DNS Security Extensions):
- Route 53 supports DNSSEC, a suite of extensions to DNS that adds an additional layer of security by signing DNS data with cryptographic signatures.
7. Integration with AWS Services:
- Route 53 seamlessly integrates with other AWS services. For example, you can use it to map custom domain names to your API Gateway, CloudFront distributions, or load balancers.
8. Global Reach and Low Latency:
- Route 53 uses a global network of DNS servers located in multiple continents, which helps provide low-latency responses for end-users worldwide.
9. Query Logging:
- Route 53 provides query logging, allowing you to log DNS queries made against your domain. This can be useful for debugging or auditing purposes.
10. Cost Structure:
- Route 53 has a pay-as-you-go pricing model, where you are billed based on the number of hosted zones, the number of queries, and the number of health checks you configure.
DAY 6 Completed, Challenge taken from GitHub Repo.
Take the same, and you will enjoy this journey 😉
Feel free to explore more of my content, and don't hesitate to reach out if need any assistance from me or in case of you have any questions.
Happy Learning!
~kritika :)
