Table of contents
- ☁️ Amazon Web Services (AWS)
- ☁️ So what exactly is S3?
- 🌟 Steps
- Log in to your AWS account (preferably using an IAM user, which is a best practice) for every learner/professional.
- Navigate to services, search for S3 (Simple Storage Service) and click on S3, create a bucket to create a bucket, fill up the needed information in the general configuration, such as bucket name, AWS, region, encryption key type by default S3 provide encryption etc.
- ☁️ Creating a static website
- ☁️ Hosting our static website on S3
☁️ Amazon Web Services (AWS)
AWS (Amazon Web Services) is a comprehensive, evolving cloud computing platform provided by Amazon that includes a mixture of infrastructure-as-a-service (IaaS), platform-as-a-service (PaaS) and packaged-software-as-a-service (SaaS) offerings. AWS services can offer an organization tools such as compute power, database storage and content delivery services.

☁️ So what exactly is S3?
Amazon Simple Storage Service (Amazon S3) is an object storage service offering industry-leading scalability, data availability, security, and performance. S3 is built to store and retrieve any amount of data from anywhere. Customers of all sizes and industries can store and protect any amount of data for virtually any use case, such as data lakes, cloud-native applications, and mobile applications.
🌟 Steps
Log in to your AWS account (preferably using an IAM user, which is a best practice) for every learner/professional.
Navigate to services, search for S3 (Simple Storage Service) and click on S3, create a bucket to create a bucket, fill up the needed information in the general configuration, such as bucket name, AWS, region, encryption key type by default S3 provide encryption etc.
☁️ Creating a static website
Well we need to learn how we can host a static website so we don't need to create a complex website we make a simple one using HTML which talks about what is AWS and has an image.
<!doctype html>
<html lang="en">
<head>
    <meta charset="utf-8">
    <meta name="viewport" content="width=device-width, initial-scale=1">
    <style>
        h1 {text-align: center;}
        body {
          background-image: url('https://i.pcmag.com/imagery/reviews/058odIpsFui7XT7sYt0XBFr-9..v1569472704.jpg');
          background-repeat: no-repeat;
          background-size: cover;
        }
        footer {
            position: fixed;
            padding: 0px 0px 0px 0px;
            bottom: 80px;
            width: 100%;
            /* Height of the footer*/
            height: 40px;
        }
        </style>
    <title>Website</title>
    <link href="https://cdn.jsdelivr.net/npm/bootstrap@5.3.2/dist/css/bootstrap.min.css" rel="stylesheet" integrity="sha384-T3c6CoIi6uLrA9TneNEoa7RxnatzjcDSCmG1MXxSR1GAsXEV/Dwwykc2MPK8M2HN" crossorigin="anonymous">
  </head>
  <body>
    <h1>You Have Hosted Your Website</h1>
    <footer>
        <div class="card text-center">
            <div class="card-body">

            <a href="http://127.0.0.1:5000" class="shadow-lg p-3 mb-5 bg-body-tertiary rounded">Home</a>
            </div>
            <div class="card-footer text-body-secondary">
                © 2024 Your Website
            <div class="progress" role="progressbar" aria-label="Animated striped example" aria-valuenow="25" aria-valuemin="0" aria-valuemax="100">
                <div class="progress-bar progress-bar-striped progress-bar-animated" style="width: 75%"></div>
            </div>
            </div>
        </div>
        </footer>
</body>
</html>
And the output looks something like this 👇🏼
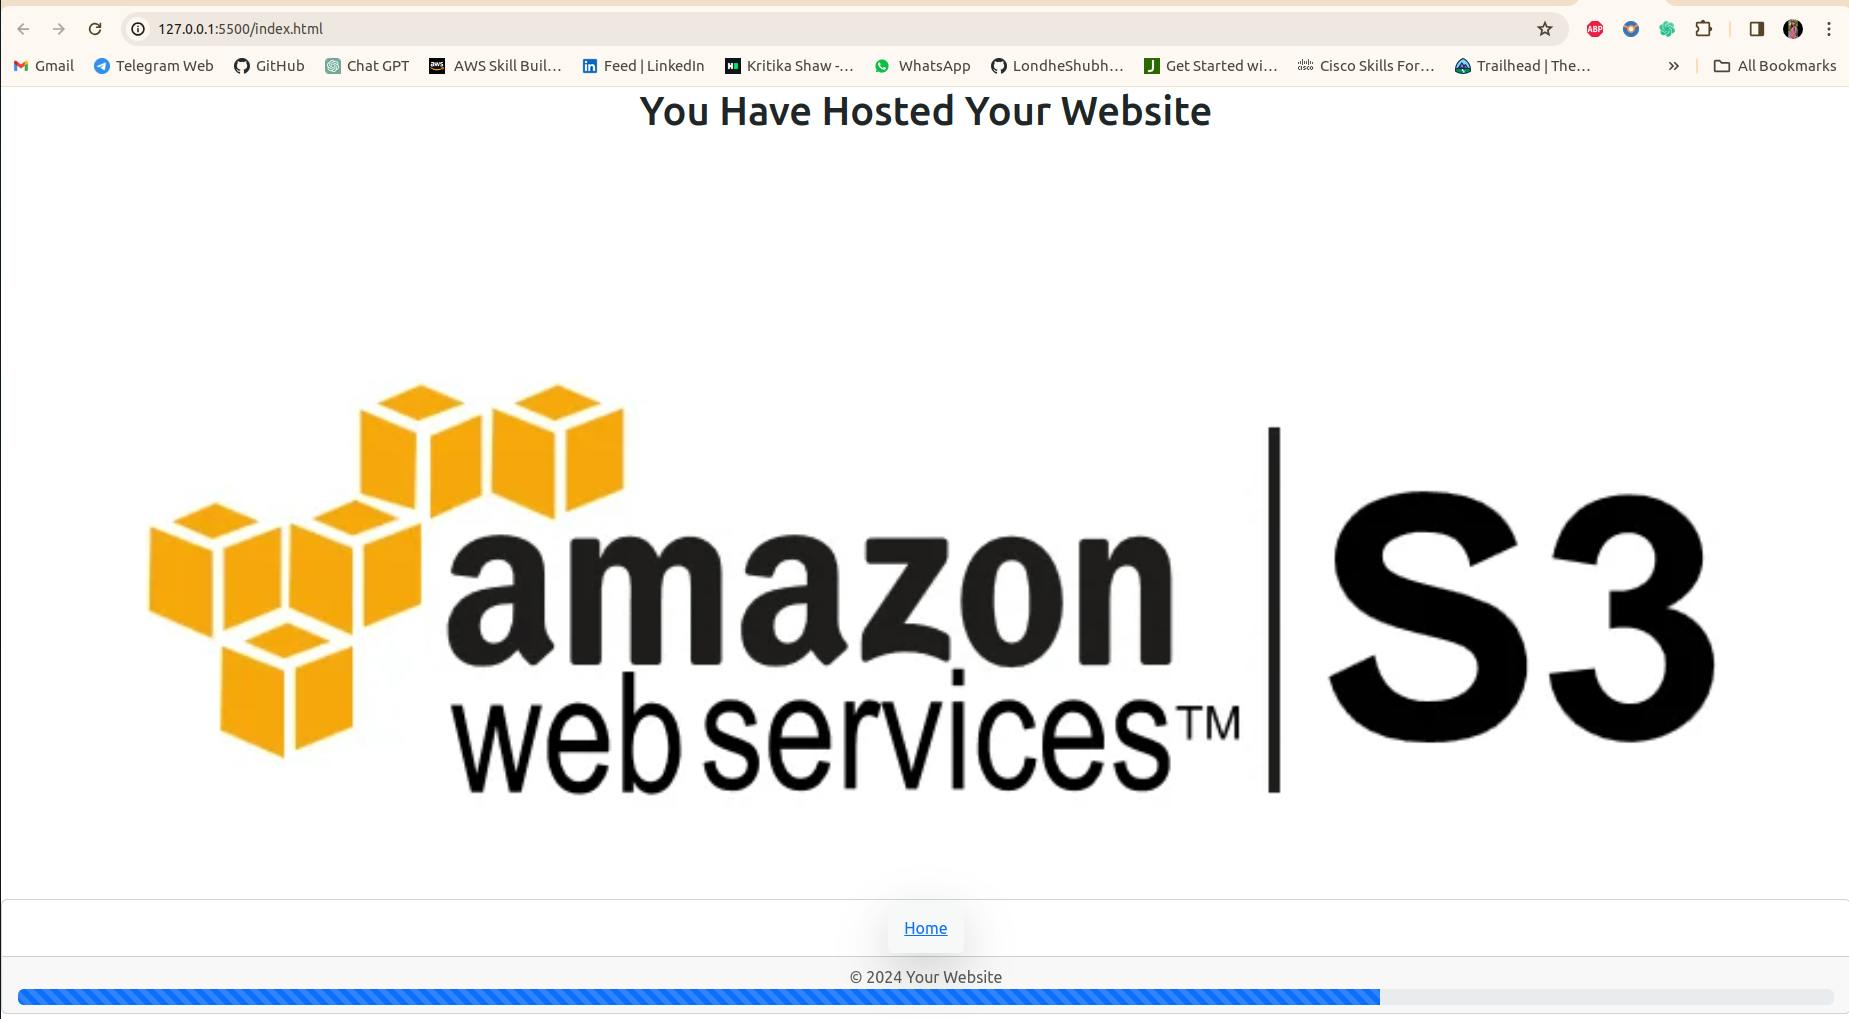
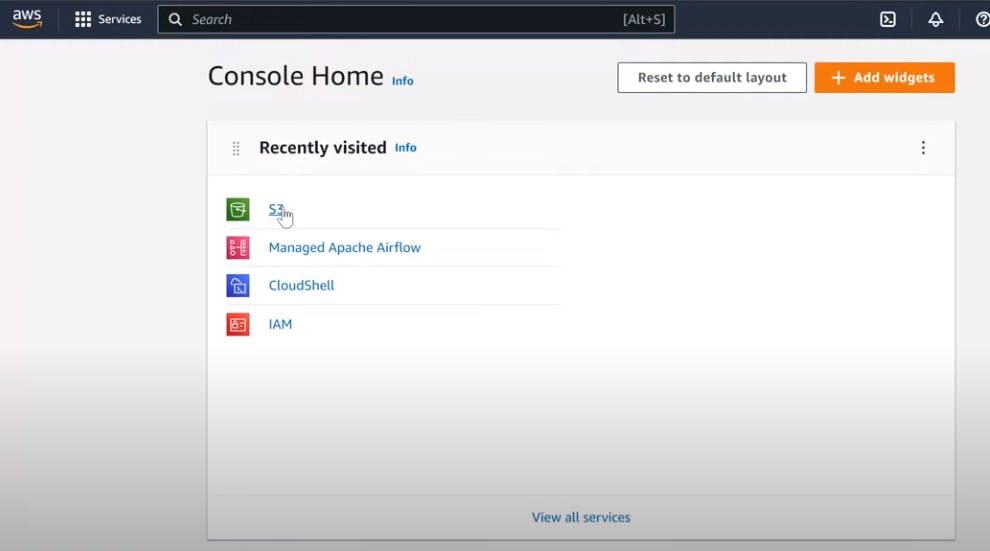
Now we need to host the very same website over at AWS S3, so for this the first step would be to log in to out AWS Management Console.
☁️ Hosting our static website on S3
There are two ways to login to your AWS Console either by root access or by using an IAM user, I strongly recommend you to login using an IAM user.
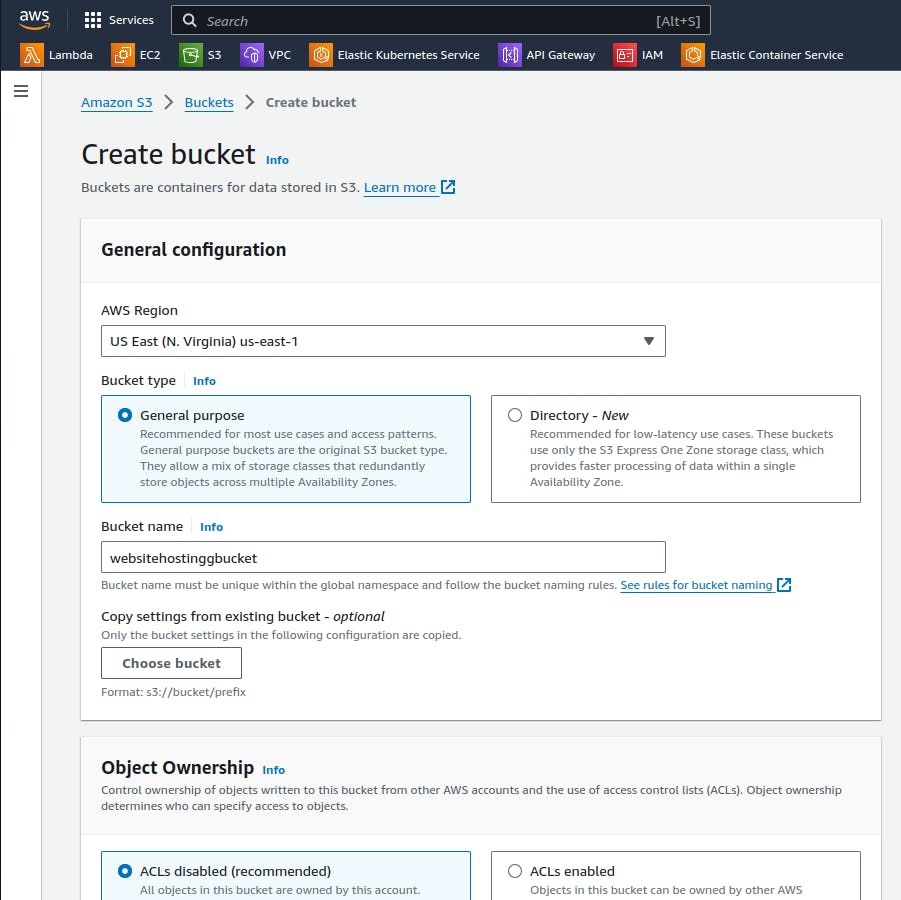
📍 Creating our S3 Bucket
Now that we have logged in to our console we head on over to S3, to create a new bucket. Well for starters whenever you'll try to create a bucket you'll see a ton of options. I recommend you to leave them as they are as we are going to tackle them at a later stage.
Just give a name to your bucket right now and click on "Create Bucket" option. Here I'm giving my bucket name as "websitehostinggbucket".
And after doing all the above things mentioned, you'll observe your bucket listed under General purpose buckets section implying that it has been successfully created.

📍 Uploading necessary files
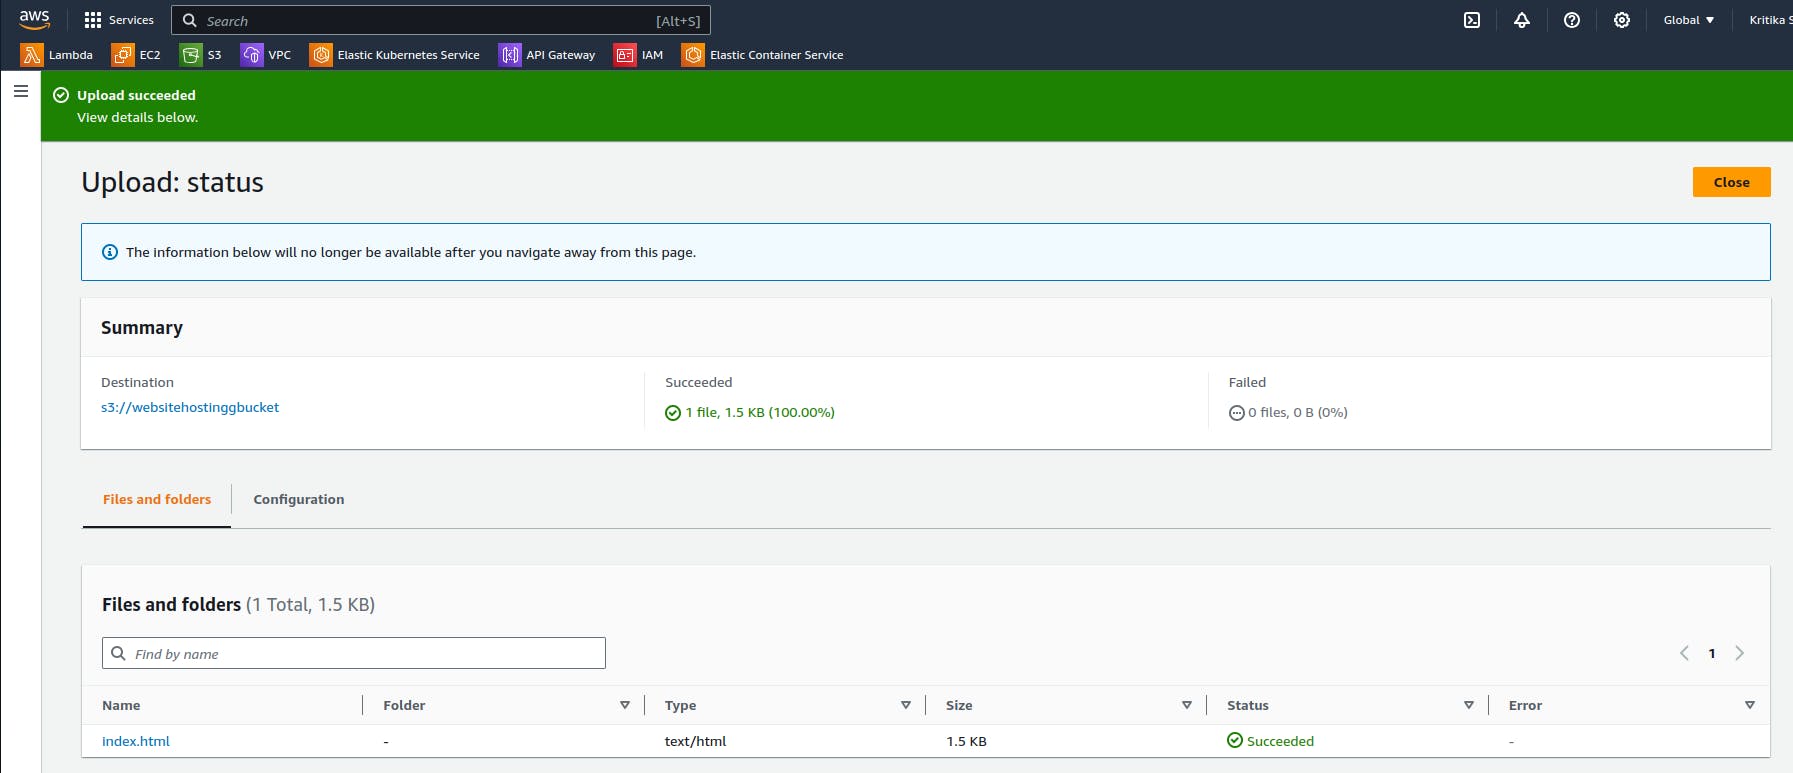
If we are going to host our static website using S3 then obviously we'll need to provide S3 with the necessary files, files here would be our html files and our image folder.
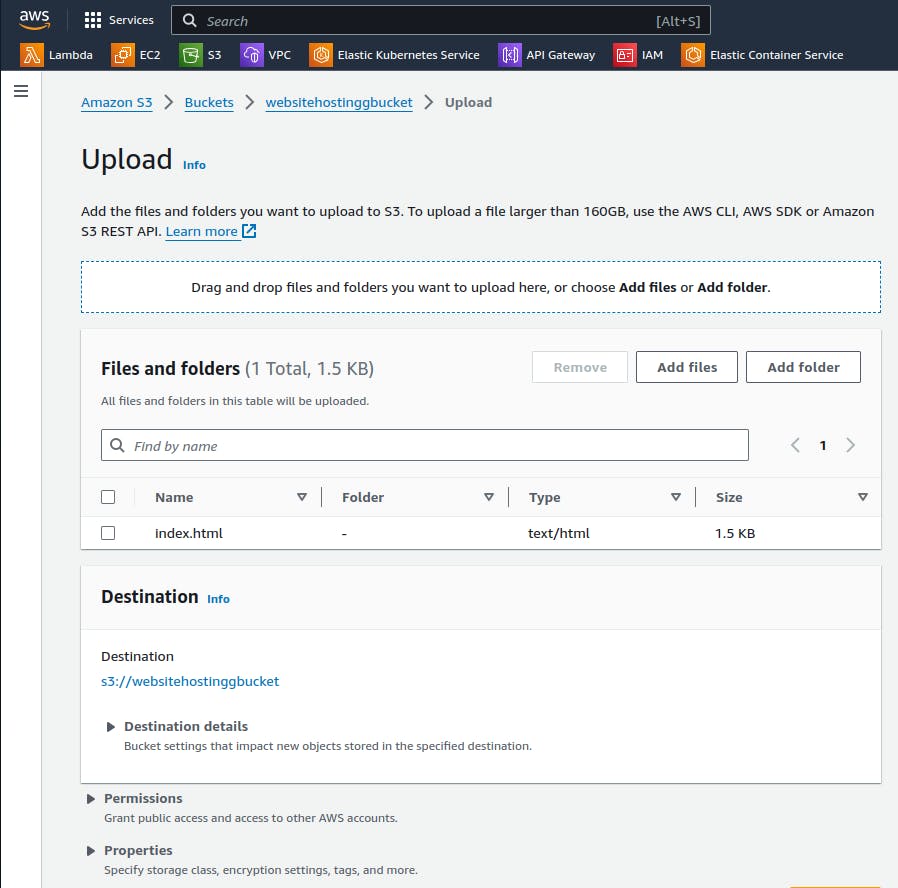
Well now if you head on over to indexhtml or your .html file in the bucket you'll find an external link through which you can access your static website. And once you try that link, you'll get something like this 👇🏼

But Why??
📍 Making our website public
Well the reason this is happening is because our website isn't publicly available and we need to do exactly the same thing i.e making it public.
We head on over to Properties section and search for Static Website Hosting option, all we have to here is enable this.

Now that we have enabled Static Hosting, we head on over to Permissions Section and search for Block Public Access option where we have to uncheck the option saying "Block all Public Access".
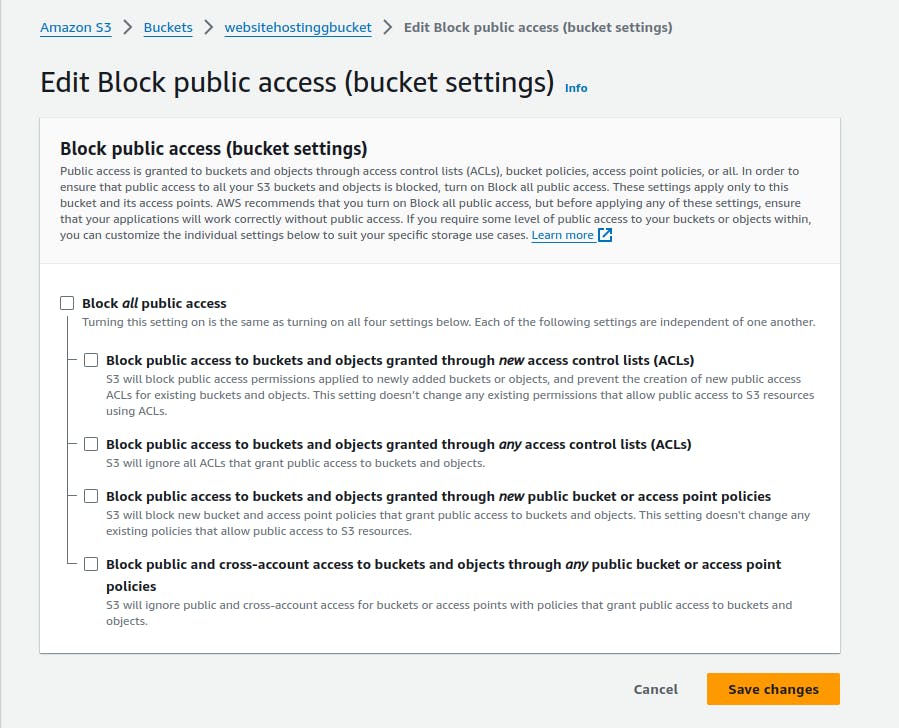
- Again test the bucket endpoint URL, it's failed to get output.

- Edit Bucket policy: bucket policy provides access to objects stored in the bucket, this is usually written in JSON; for this project, it is essential to explicitly allow and ensure the resource is having the name of the particular bucket the static files are stored in (this can be copied from the top, the bucket ARN.)
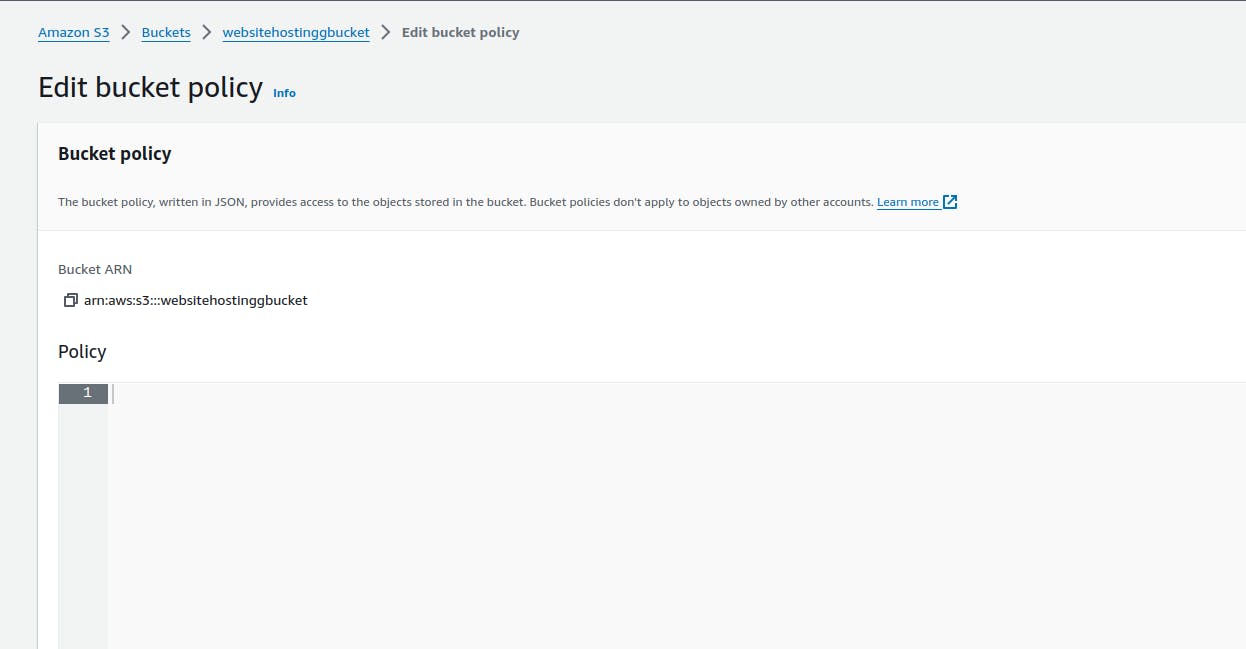
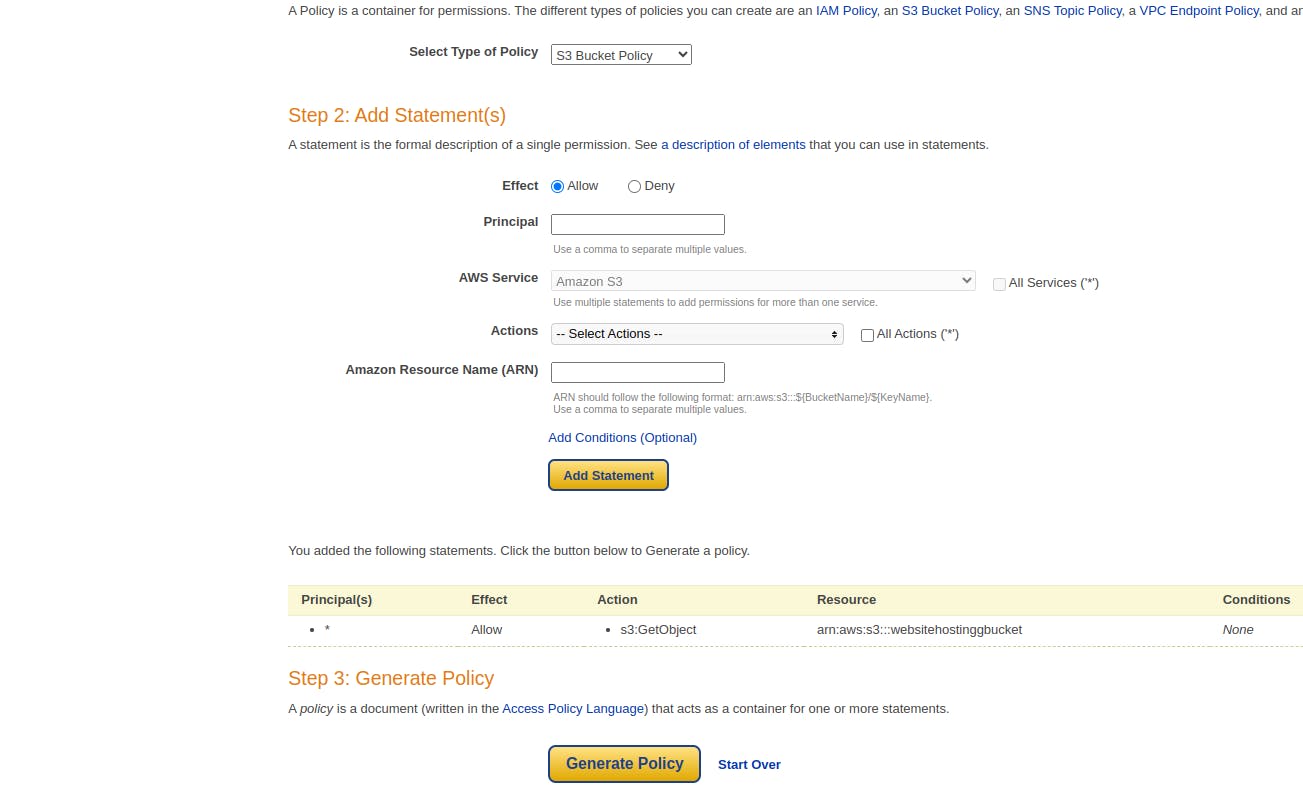
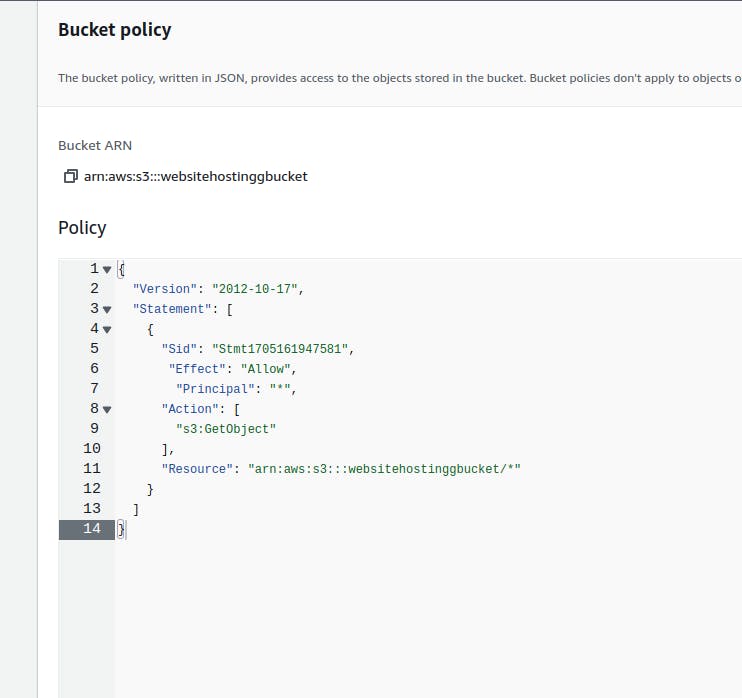
- Bucket policy has been successfully edited, and blocking all public access has been turned off.
Well now our bucket is publicly accessible but we also need to make sure the contents of our bucket are also publicly accessible so for this we again head on over to Permissions Section but this time we search for Object Ownership Option, where we enable ACL or Access Control List.
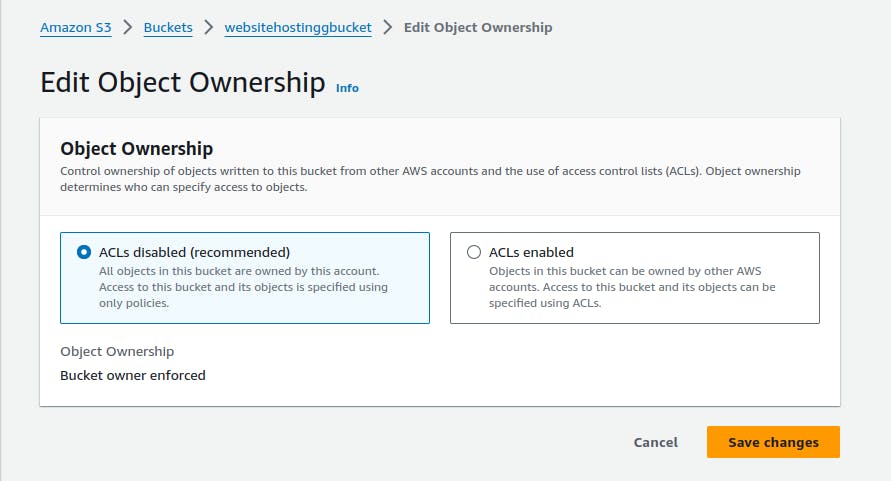
Now we just head on over back to our bucket components and make them both public using ACL.
Note that the bucket policy resource has the name of the bucket I am currently working with.
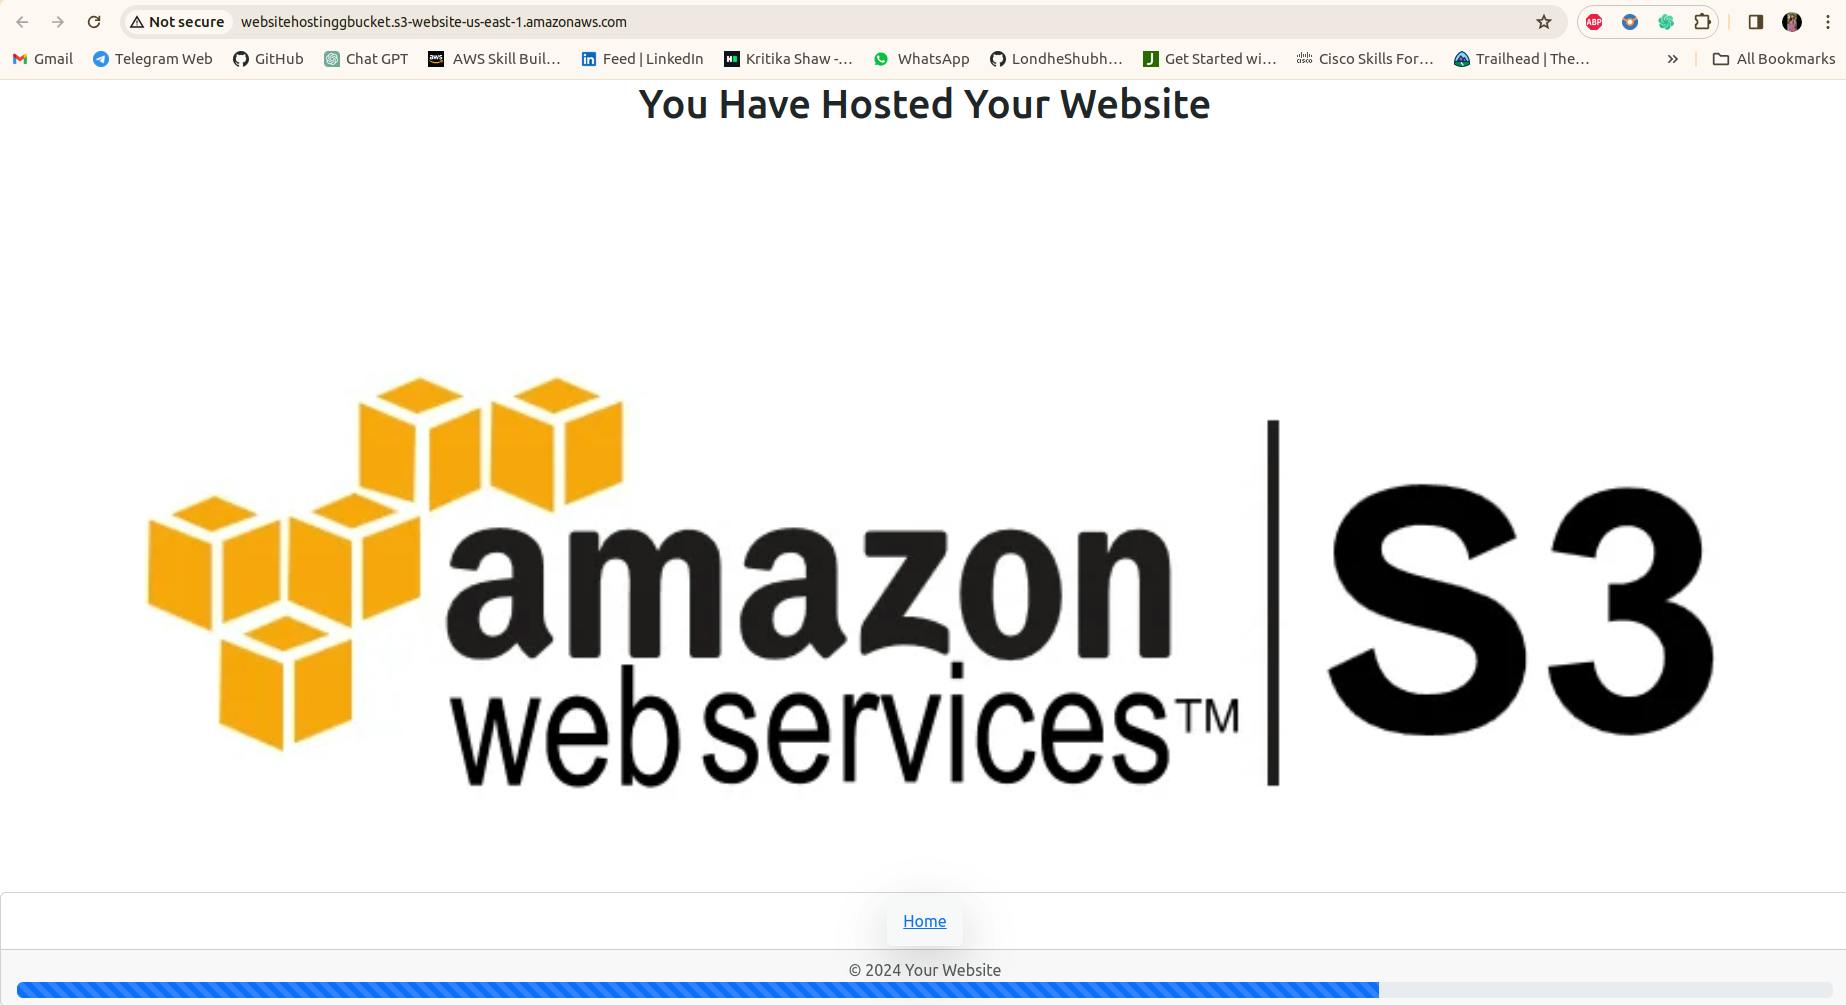
Copy the URL and paste it into the browser, and the static site (well-configured and made publicly accessible) will be visible on the browser.
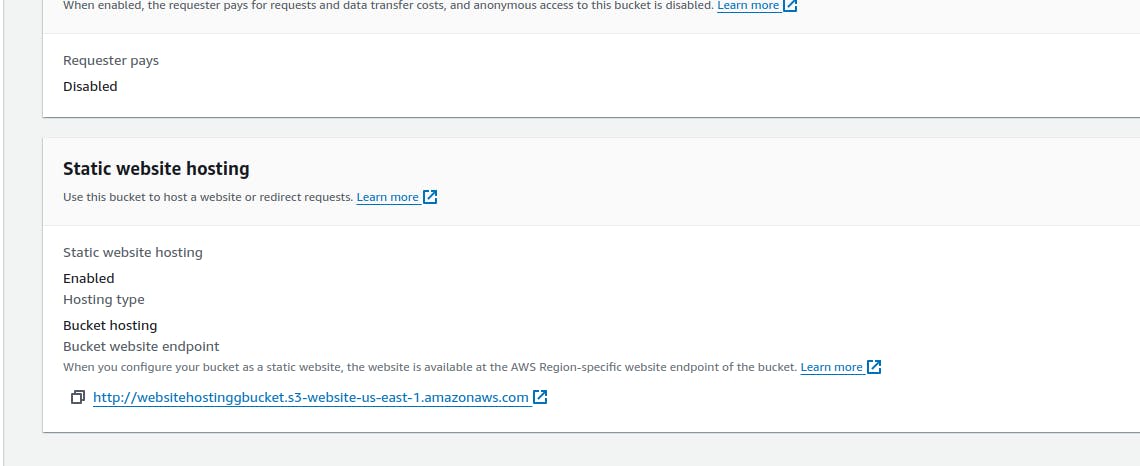
Thank you so much for taking the time to read till the end! Hope you found this blog informative and helpful.
Feel free to explore more of my content, and don't hesitate to reach out if need any assistance from me or in case of you have any questions.
Happy Learning!
~kritika :)
Connect with me: LinkedIn
